
Weather changes come with the promise of longer days and opportunities to work on that long-awaited home repair. To get you thinking about which improvement you’ll want to tackle, here are some
This item is available in full to subscribers.
At this time, we ask you to confirm your subscription at www.themtnear.com, to continue accessing the only weekly paper in the Peak to Peak region to cover ALL the news you need! Simply click Confirm my subscription now!.
If you are a digital subscriber with an active, online-only subscription then you already have an account here. Just reset your password if you've not yet logged in to your account on this new site.
Otherwise, click here to view your options for subscribing.
Questions? Call us at 303-810-5409 or email info@themountainear.com.
Please log in to continue |
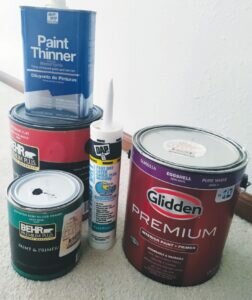
Weather changes come with the promise of longer days and opportunities to work on that long-awaited home repair. To get you thinking about which improvement you’ll want to tackle, here are some ideas to keep you busy until warm days arrive.
Home improvement projects can include painting, landscaping, flooring, or remodeling. Since the unpredictable spring weather can make it challenging to go outside to begin work on our decks, we’ll discuss painting.
Have you ever walked into a room and thought, “I want to change the feel of this space?” An easy way to spice up an area is by painting it. Perhaps, it’s only one wall or its door. Here are steps for a DIY painting project at home.
Your first step is to determine whether your walls were painted with latex or oil-based paint. If your new color is latex-based and your current paint job is oil-based, you’ll need to sand the wall and apply bonding primer before adding different paint.
Test your current paint by simply dipping a cotton ball in rubbing alcohol. Rub it over a section of paint. If the paint comes off, it’s latex. If it doesn’t, it’s oil-based. Testing the paint on your wall will also help you decide what paint finish to buy. Matte, gloss, eggshell, satin, or flat?
As far as painting utensils go, purchase brushes and rollers. Painting brushes are great for small areas along baseboards and hard-to-reach places, and rollers are perfect for walls. Don’t forget a couple of paint trays, but the experts at your local home improvement store should help you with the necessary products.
Then, prep the space. If you’re painting the entire room, remove all furniture or move everything to the center, covering the items, fixed lights, and floor with plastic. If you have a ceiling fan, you should be able to remove the blades and cover the fixture. Next, remove outlet covers.
Use painter’s tape to cover exposed switches, door handles, baseboards, around windows, and any area you don’t want paint on. Use a putty knife to scrape off any peeling or flaking paint on the walls. Fill any holes with spackle.
Dust the walls you’ll be painting with a damp rag or sponge. Apply primer to your walls, including any area you spackled or scraped. Experts recommend you wait around three hours for the primer to dry before painting.
Play your favorite tunes, open the windows, and get ready to prep, primer, and paint your new space! For more painting tips, check out https://www.architecturaldigest.com/story/how-topaint a-room-10-steps.


